


|||||||||||||||||||||||||||||||||||||||||||||||||||||||||||||||||
Making Skin Using Blender
|||||||||||||||||||||||||||||||||||||||||||||||||||||||||||||||||
Requirements:
1)Blender 3D modelling software.
Site- https://www.blender.org/download/
2)Basic navigation skills in blender.
Video- https://www.youtube.com/watch?v=zHdTUJBs7so
https://www.youtube.com/watch?v=xT2mtoDnSzM (optional)
3)Any Image Editor you are familiar with. ( I use photoshop CS6 )
-----------------------------------------------------------------------------------------------------------------------------------------------------------------------------------
Open Blender.
Set up the work table:
0)press a to select everything then press delete button.
1)Make sure you are in cycles render
2)This is the mode selection.We will be using
Object mode.(for selecting and transforming our model)
Edit mode.(for viewing the model geometry)
Texture Paint.(for painting)
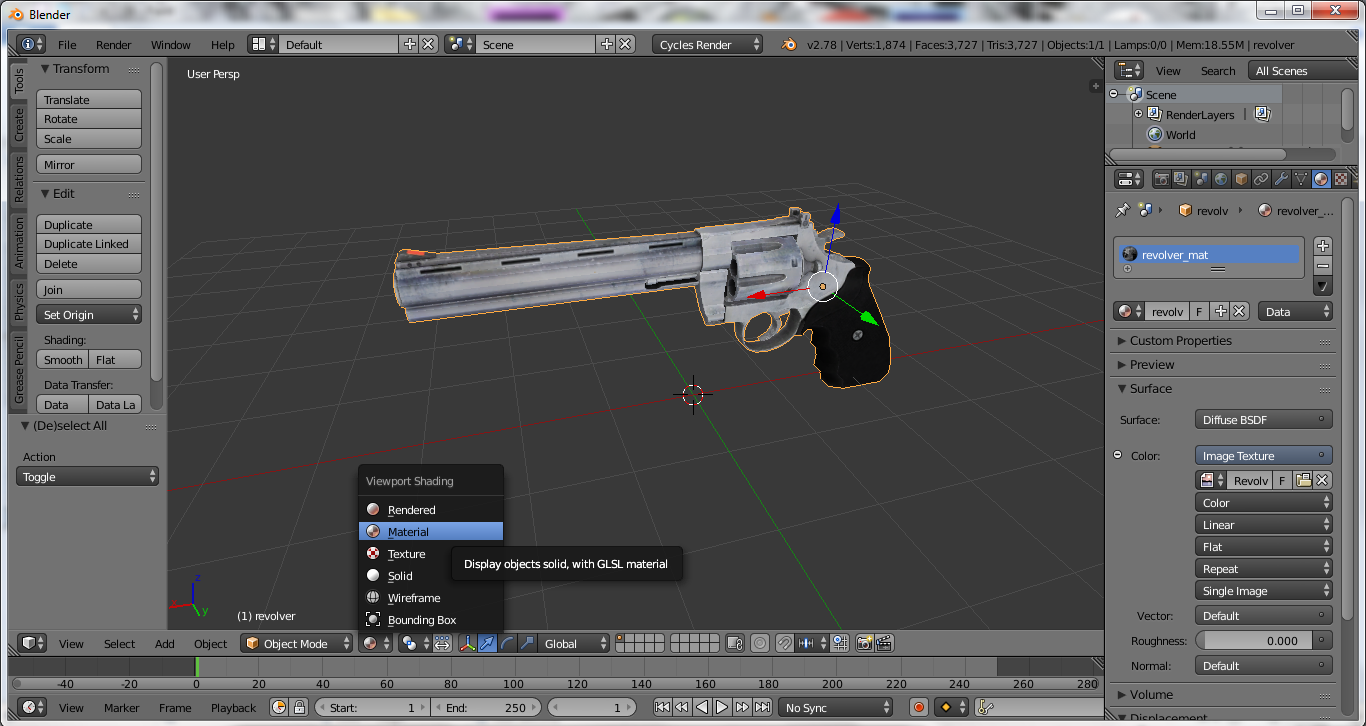
3)This is the viepoint shading option.We will be mostly using materials option.(or you can also use texture shading)

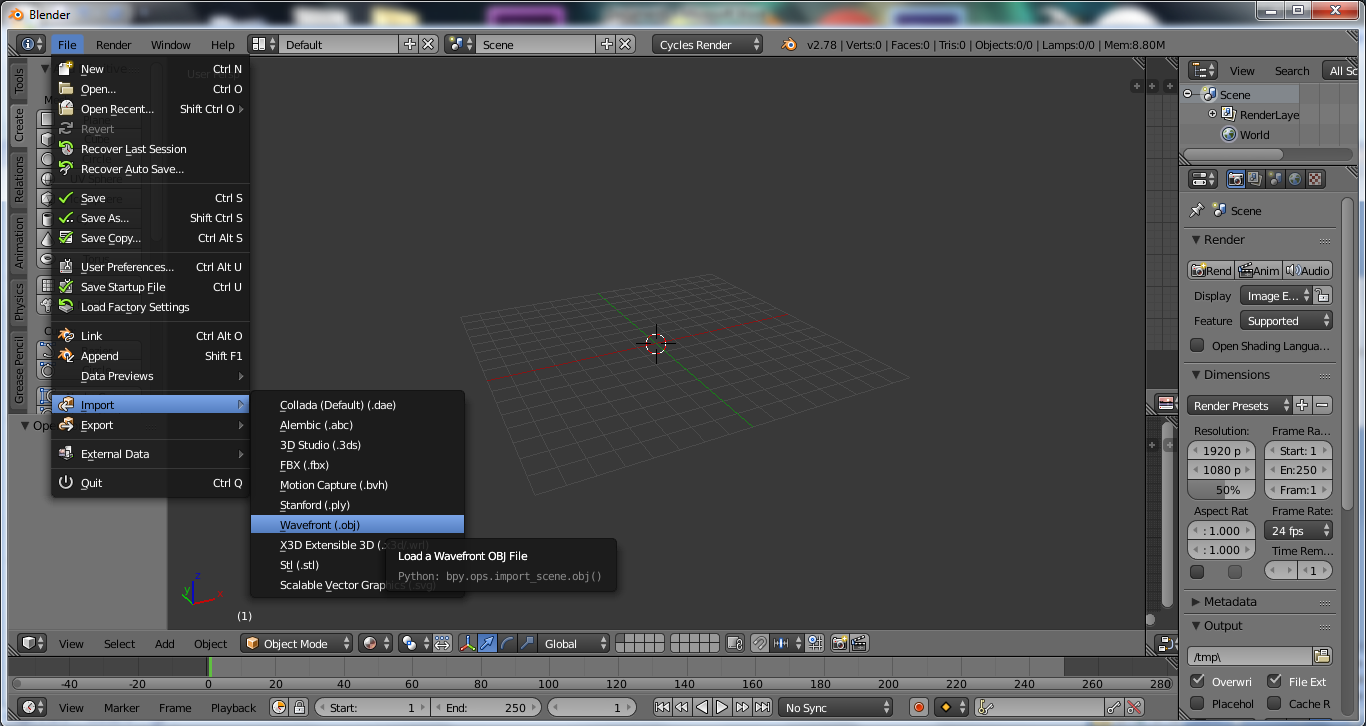
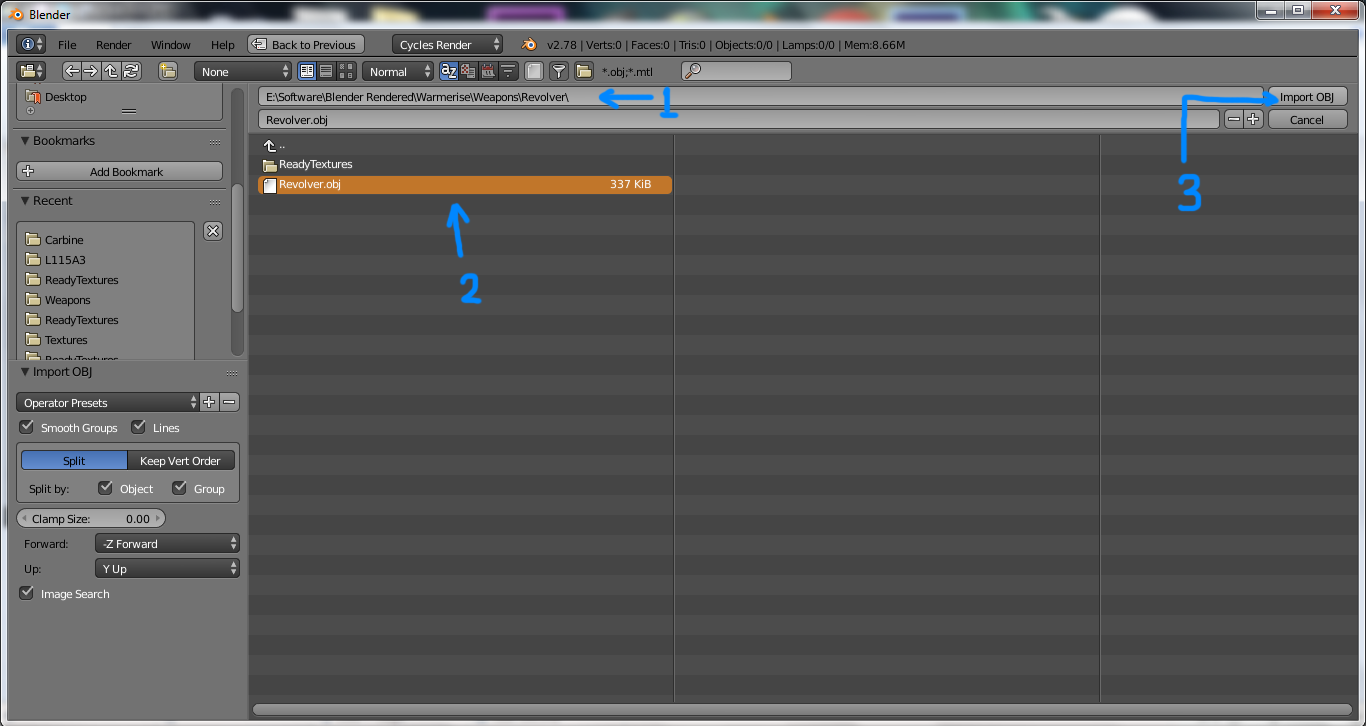
1)Select the path where the model(the .obj file) is located
2)Select the .obj file
3)Press Import OBJ
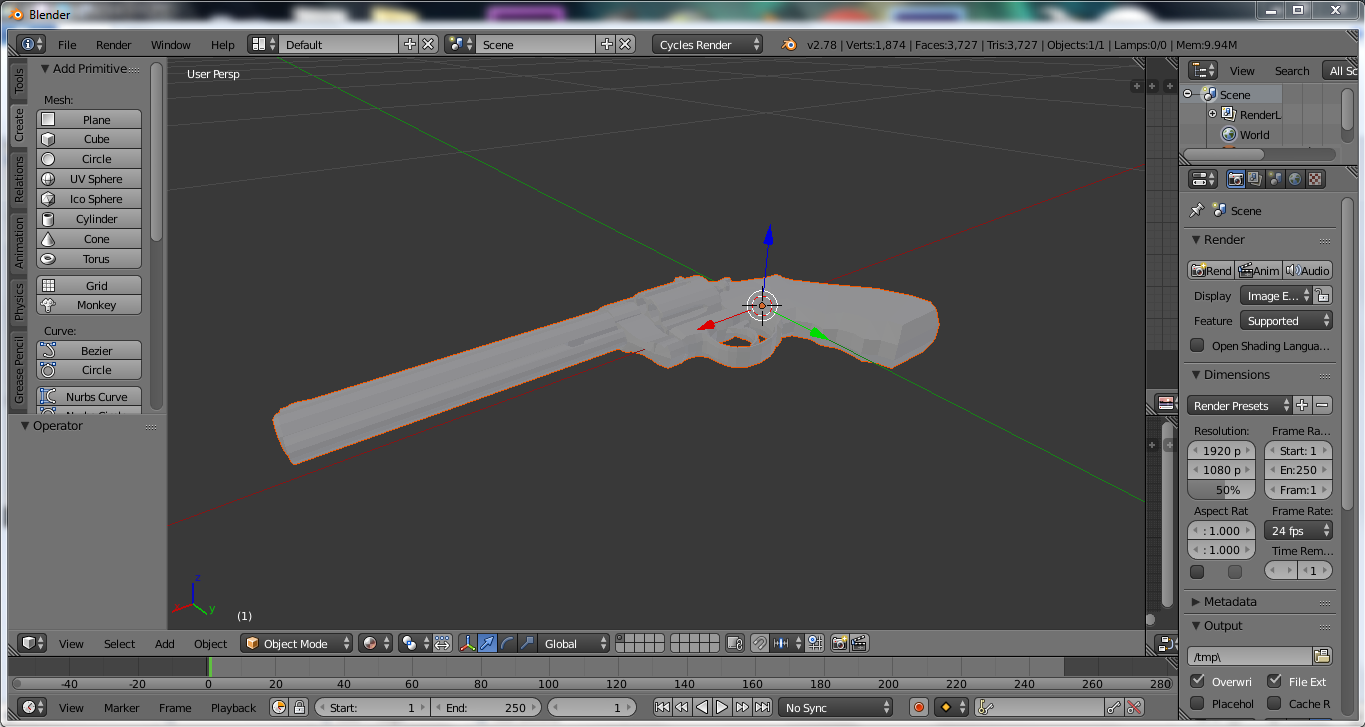
The model will be imported to you 3d view.The model might be very small that at first you wont notice it.Dont worry, press S to scale and type 100 , then press enter.The model will be scaled to 100 times it original size.
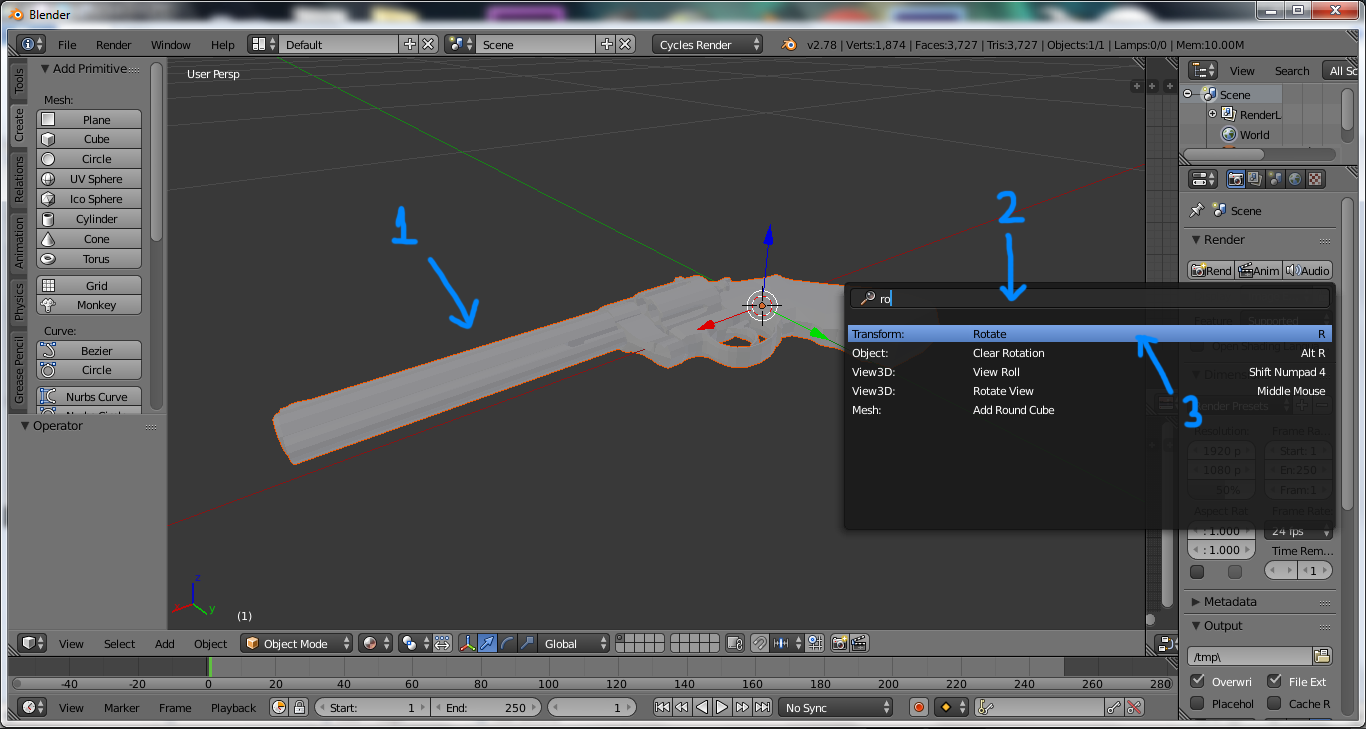
1)The model will be out outlined in orange as shown.Right click to select it(the outline will turn yellow)
Now press spacebar to pull out the search. (it is your spellbook you can use it for the time being untill you memorise the spells).
2)So now start typing rotate in the search bar.It will show all the spells(operations) matching what you write on the search bar.
3)Select "Rotate" of "Transform" type operation.The spell(shortcut) is also written on the right hand side of each operations.For rotate its R.You could have pressed R instead of going by this method also.
(Side note: Spellbook is only encouraged for newbie 3D magicians.Try memorising the spells(shotcuts) and use them.
The previous scale transformation could also have been done this way, for that start typing scale and you will get the options.)
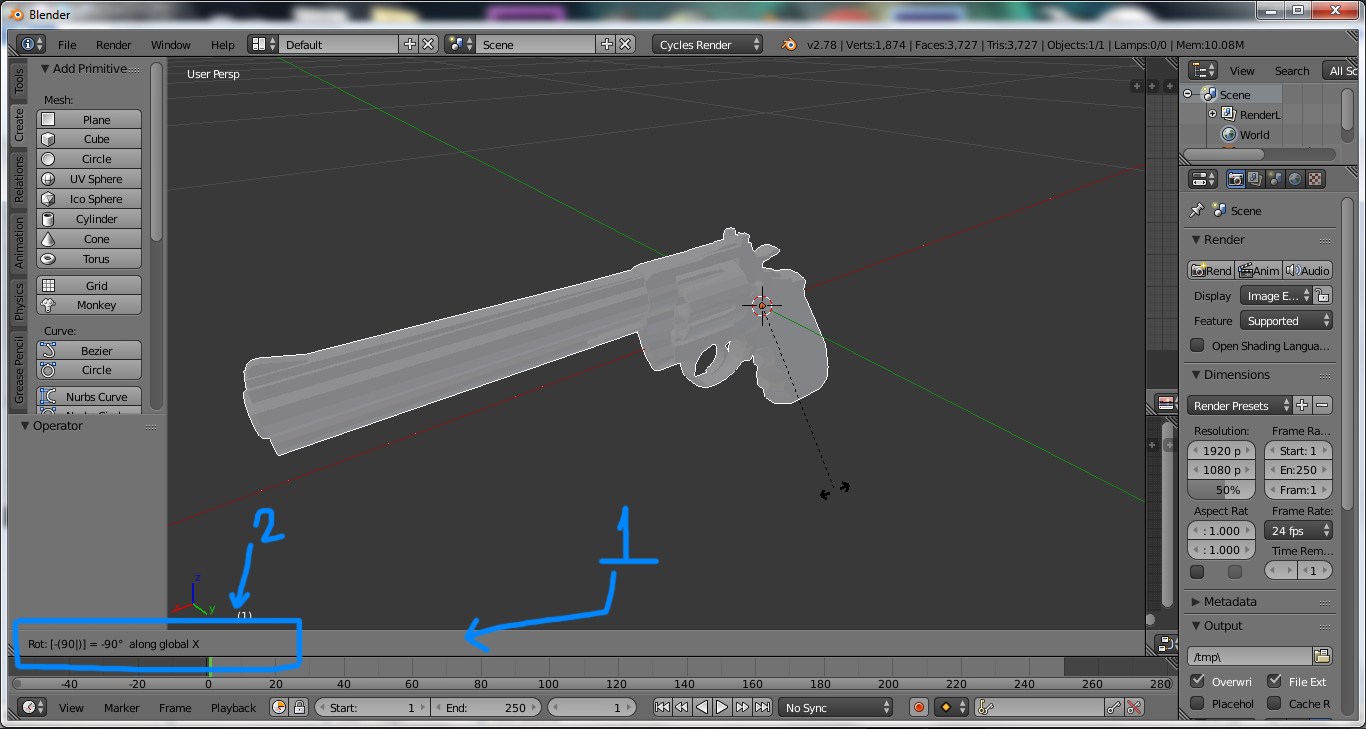
Now back to rotating the revolver.
1)This panel shows all the relative information related to the corrent operation that you are performing.In this case it is showing us the rotation angle and axis of rotation.
2)After pressing R or selecting the Rotate option press X to set the rotation axis to X-axis.Then press -90 and then enter to rotate the model by -90 degrees.
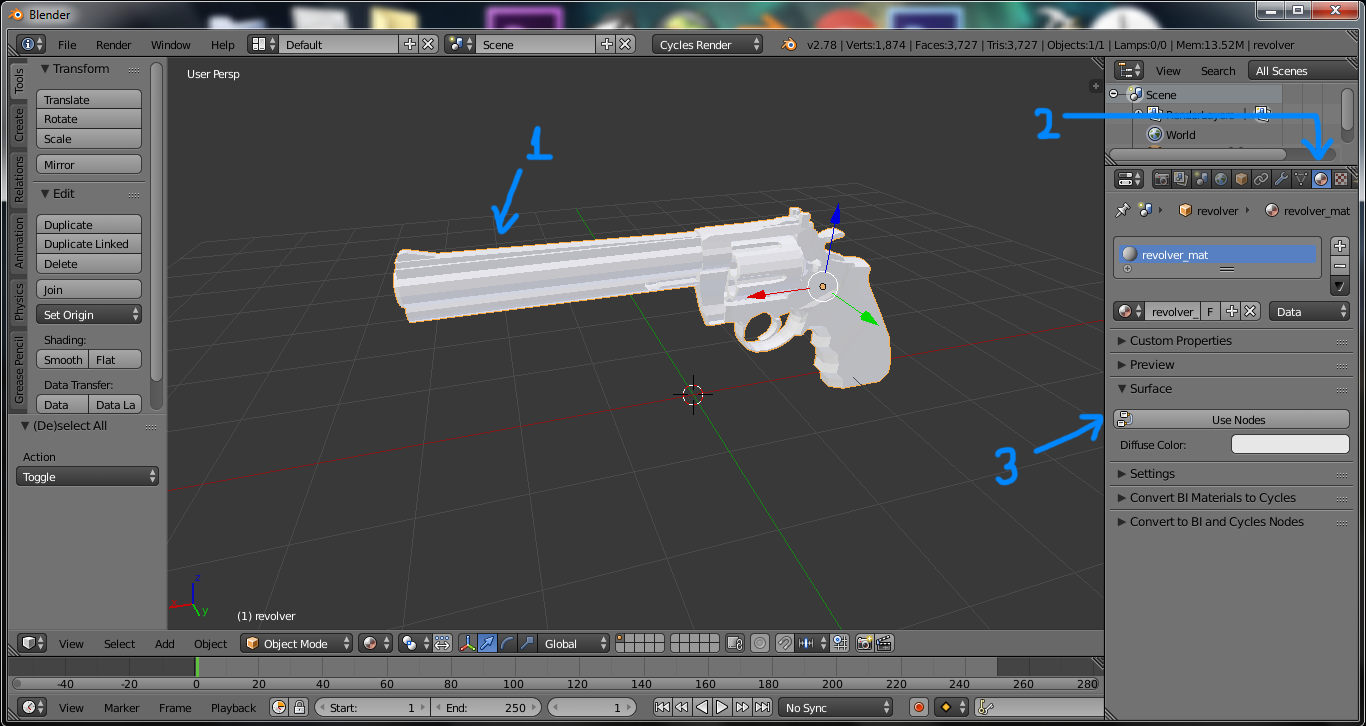
1)Select the model is it is not already selected.
2)Go to the materials tab.You might not be able to see it, just pull the margin to left side to widen the area of the right panel.
3)Press the Use Nodes button.
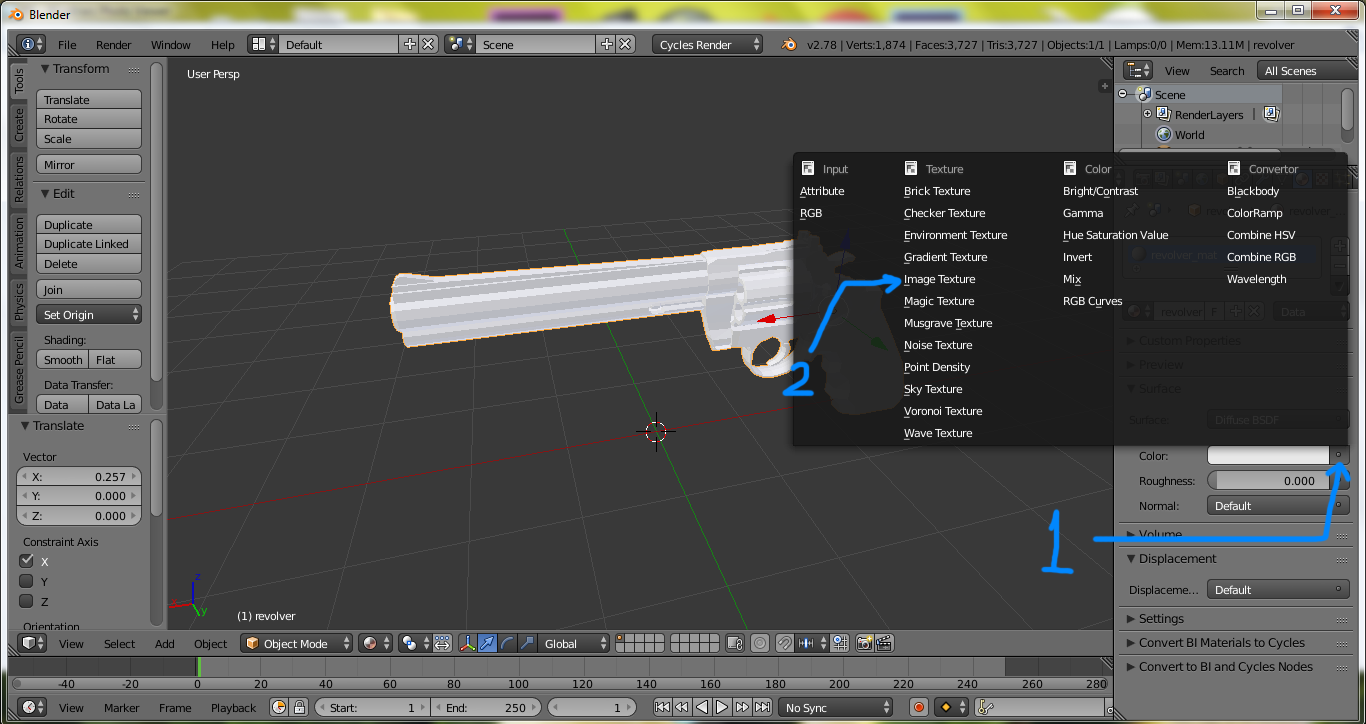
1)Now press the small circle over there.A pop up chart will appear.
2)From the pop up chart select Image texture.
1)Now press Open button.
A page will open like it did while importing the .obj file.From their browse to the location where your texture is located.It could be the default texture or a new blank texture that you have previously created using any image editor.
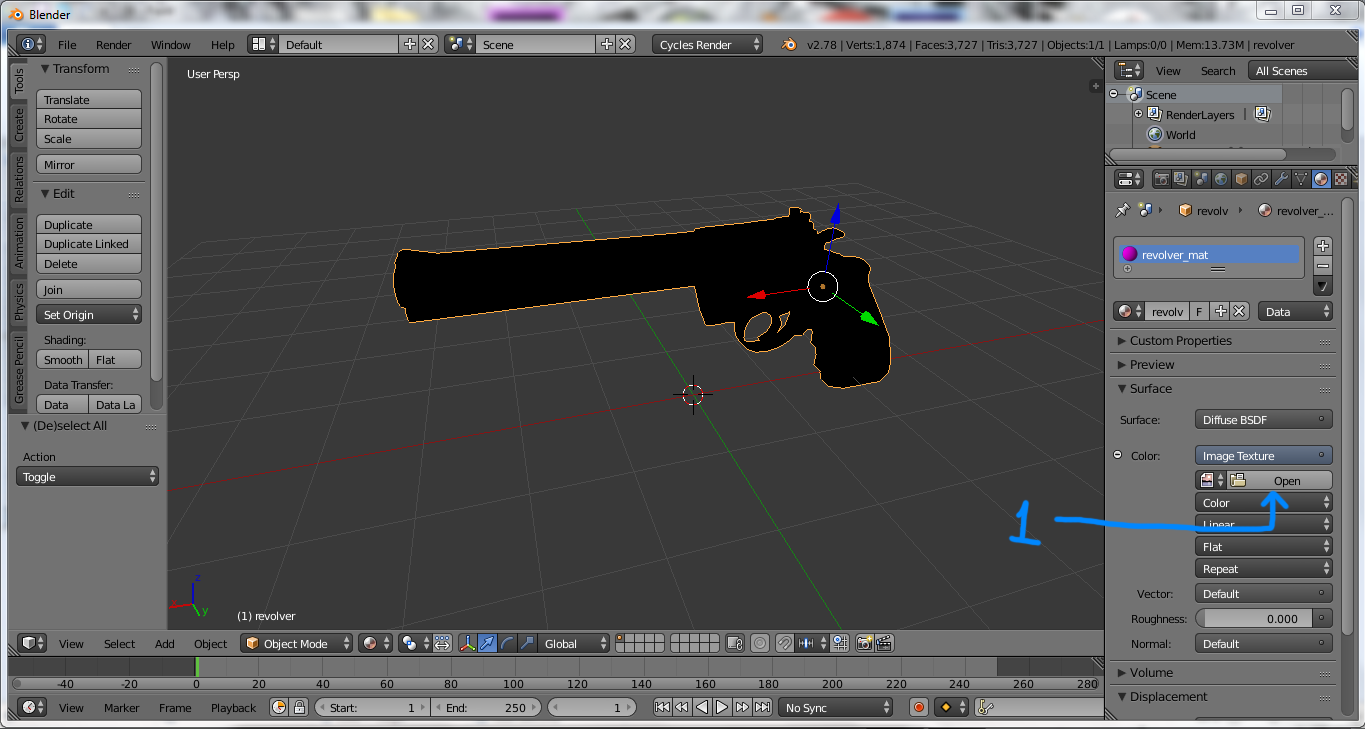
The texture will load and you will be able to see the texture applied on the model.Make sure that materials or texture mode of shading is selected.
In solid viewport shading texture will not be displayed.
Now go to screen layout option and choose UV Editing.
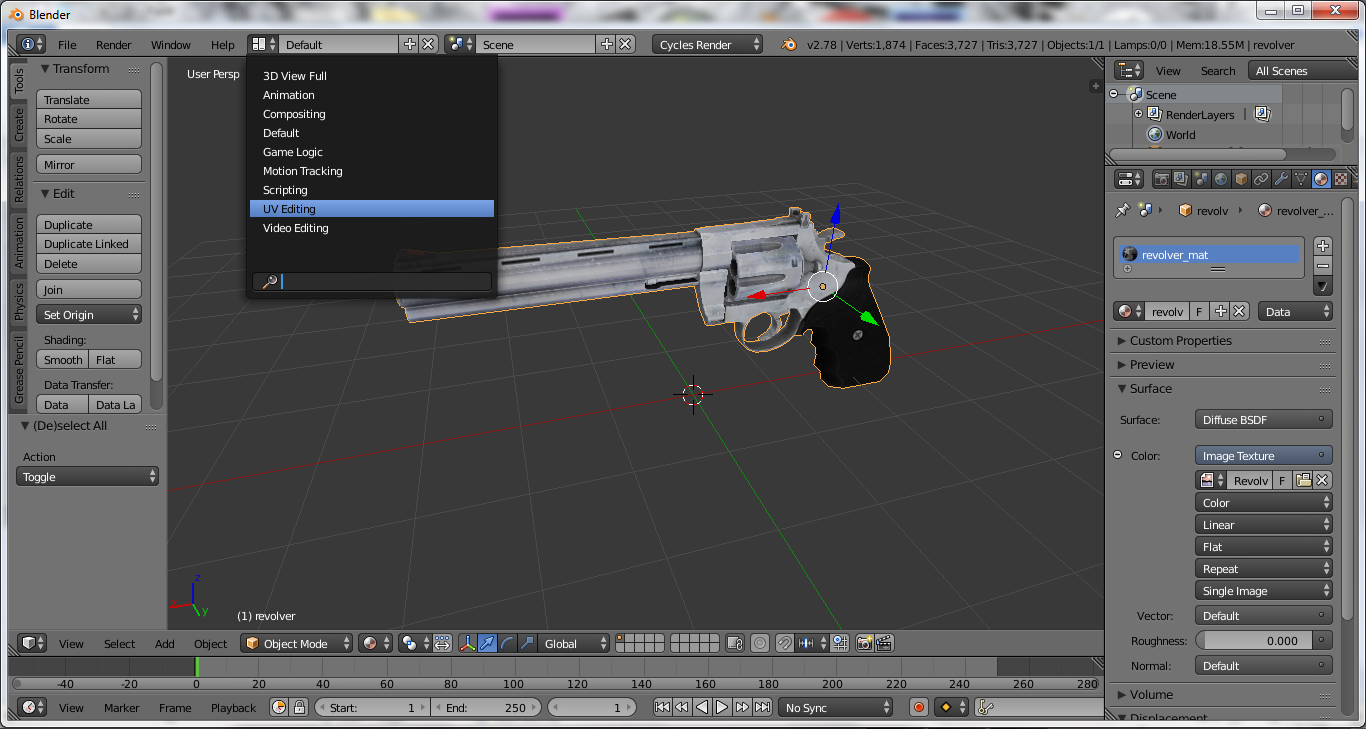
The screen will be split into two parts.
Press the button on the left side of +New button and select the texture that you opened earlier.
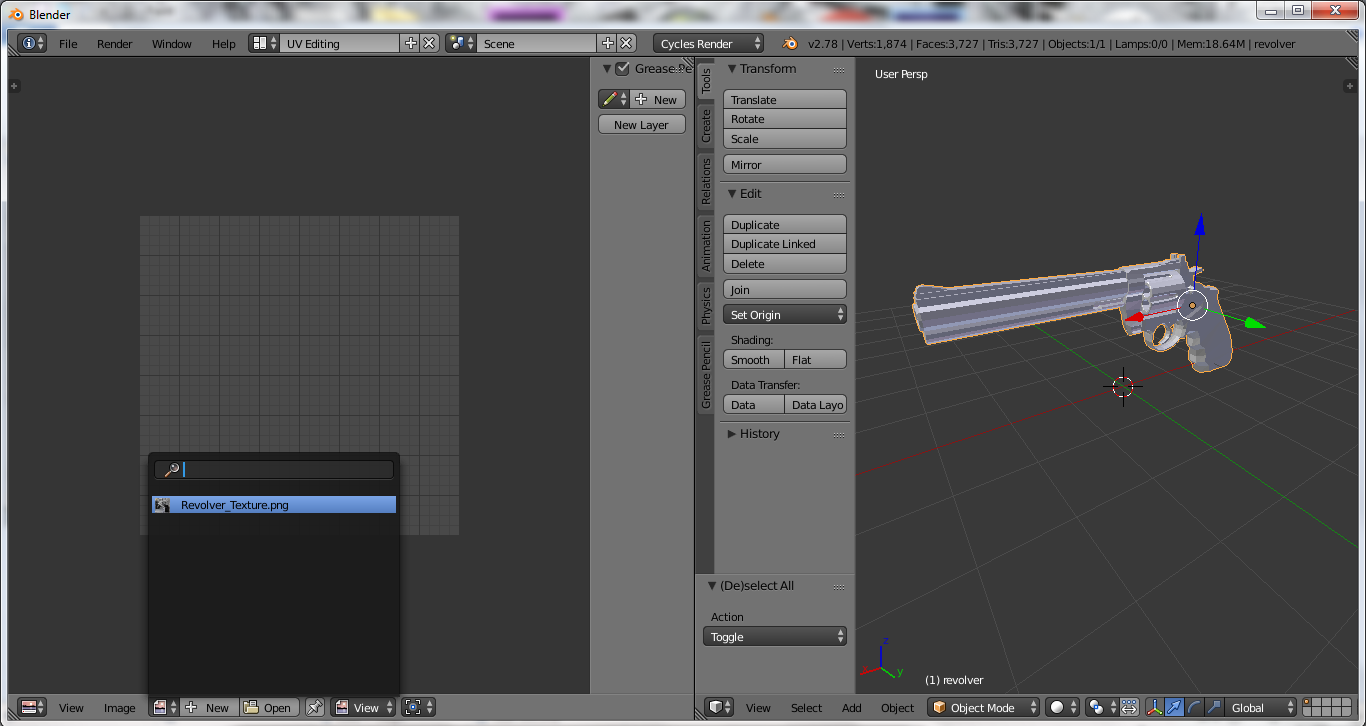
The texture will open up on left window.You can work with the model on the right window.
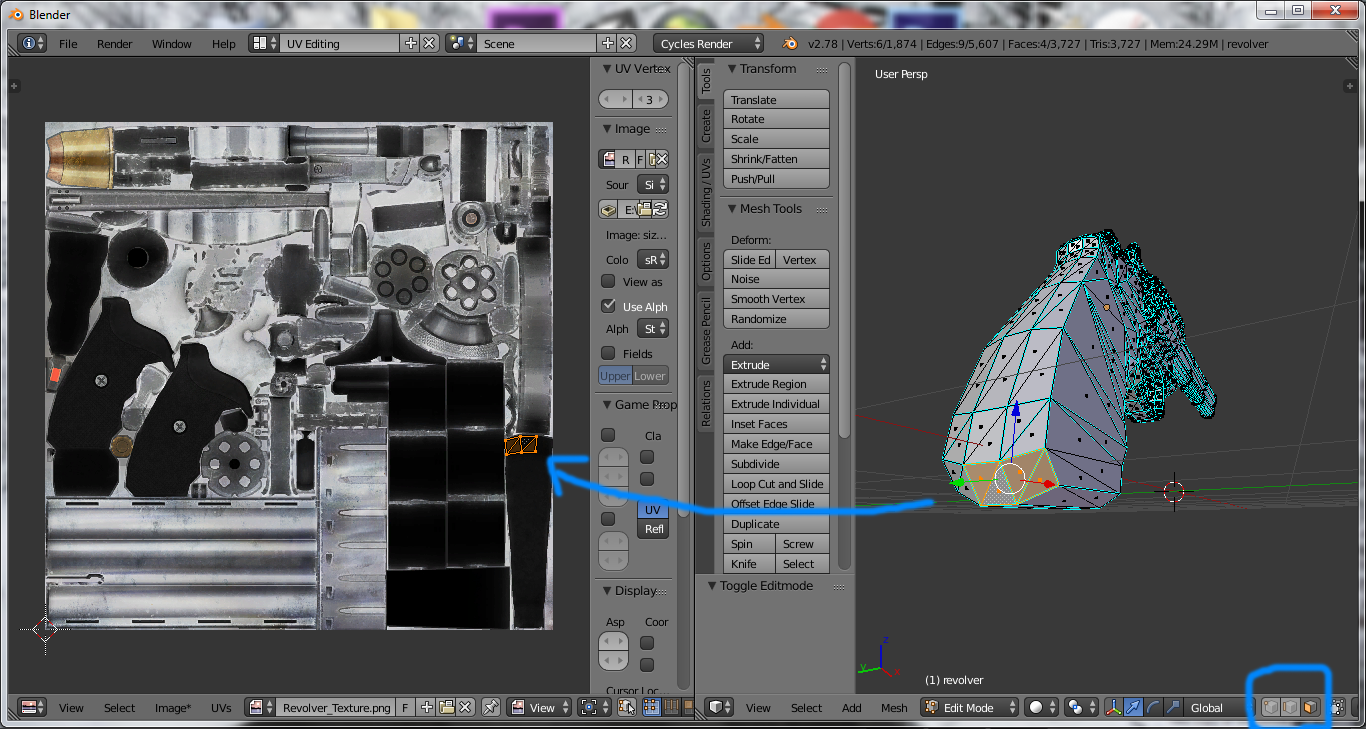
Now on the right window change the mode from "Object Mode" to "Edit Mode".
In edit mode you will see the actual model with all the edges marked.
There are 3 types of selection: Vertex selection , Edge selection and Face selection.
Anything that you select on the model on the right hand window is highlighted on the left hand window.
As you can see in the screenshot.The faces that I selected in the right window is being highltghted in the left window.
(Side note:To select all or deselect all press A. The selection mode(vertex or edge or face) can be selected by pressing the 3 buttons on bottom right corner of the screenshot.
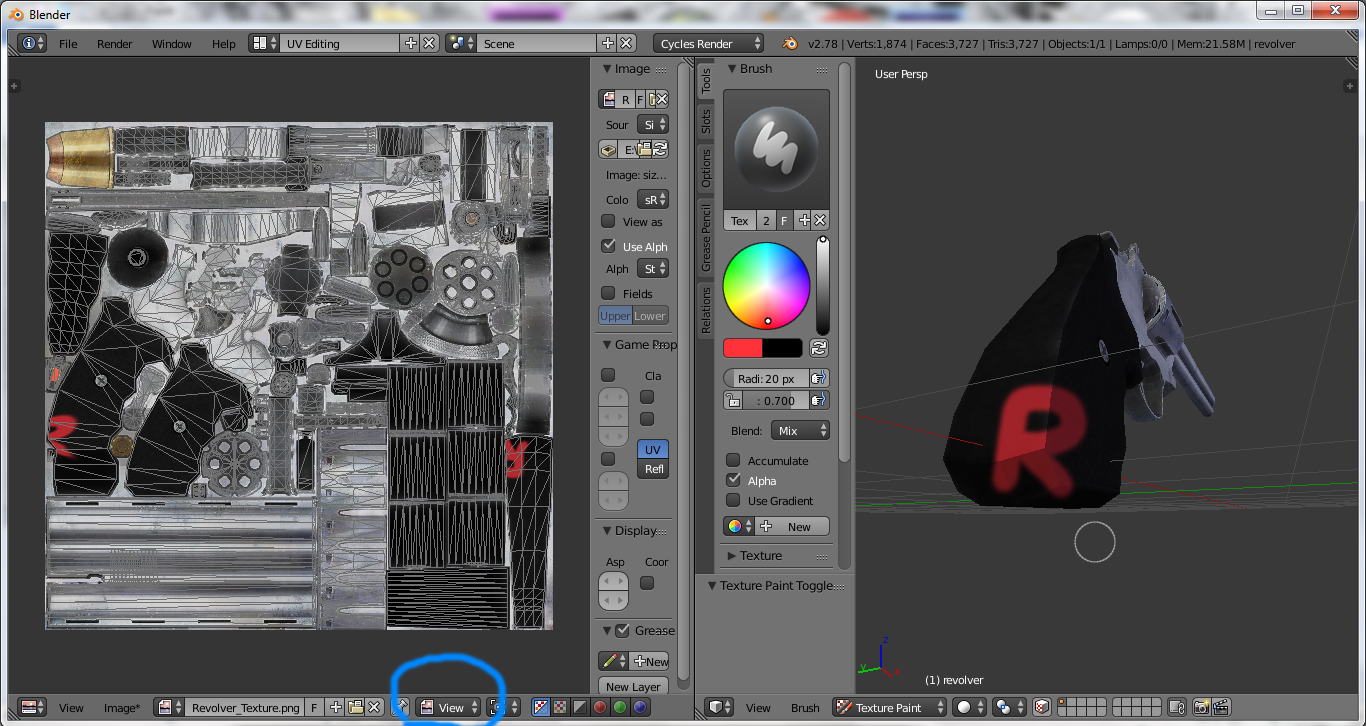
Now you can either use the image editor to start editing(painting) the texture or you can do 3d texture painting on Blender.
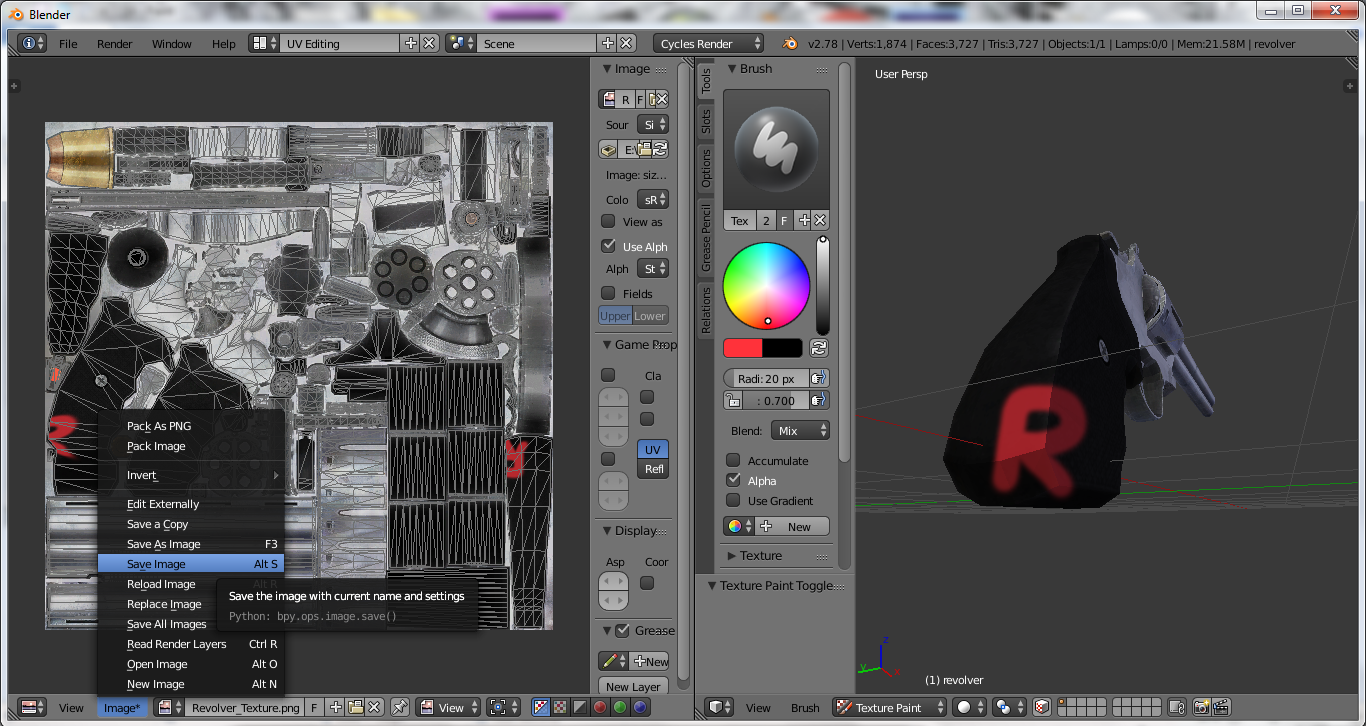
Remember Blender keeps a seperate copy of the image. So any change you make in blender or the image editor(PS, Gimp etc..) will not be reflected unless you save the changes from the software that changed the image ( Blender or Photoshop) and also unless you reload the image in the other software (Photoshop or Blender) after saving it.
To 3D texture paint in blender go to Texture Paint mode on the right window.
You can modify the brush options(colour,blend mode... and lot other stuffs)from the middle panel.And start painting directly on the model.
You can also paint on the texture on the left window by going into Paint mode instead of View mode.
Remember to save your image at frequent intervals so that you dont lose you hard work in case of any faliure.
Also while switching from one software to other remember to save and reload the image to see the changes in the other software.This also means you cannot work with layers if your image format is not .psd ( So my tip is that you create a .psd image and use it at first. On completion you can save it as a .png image)
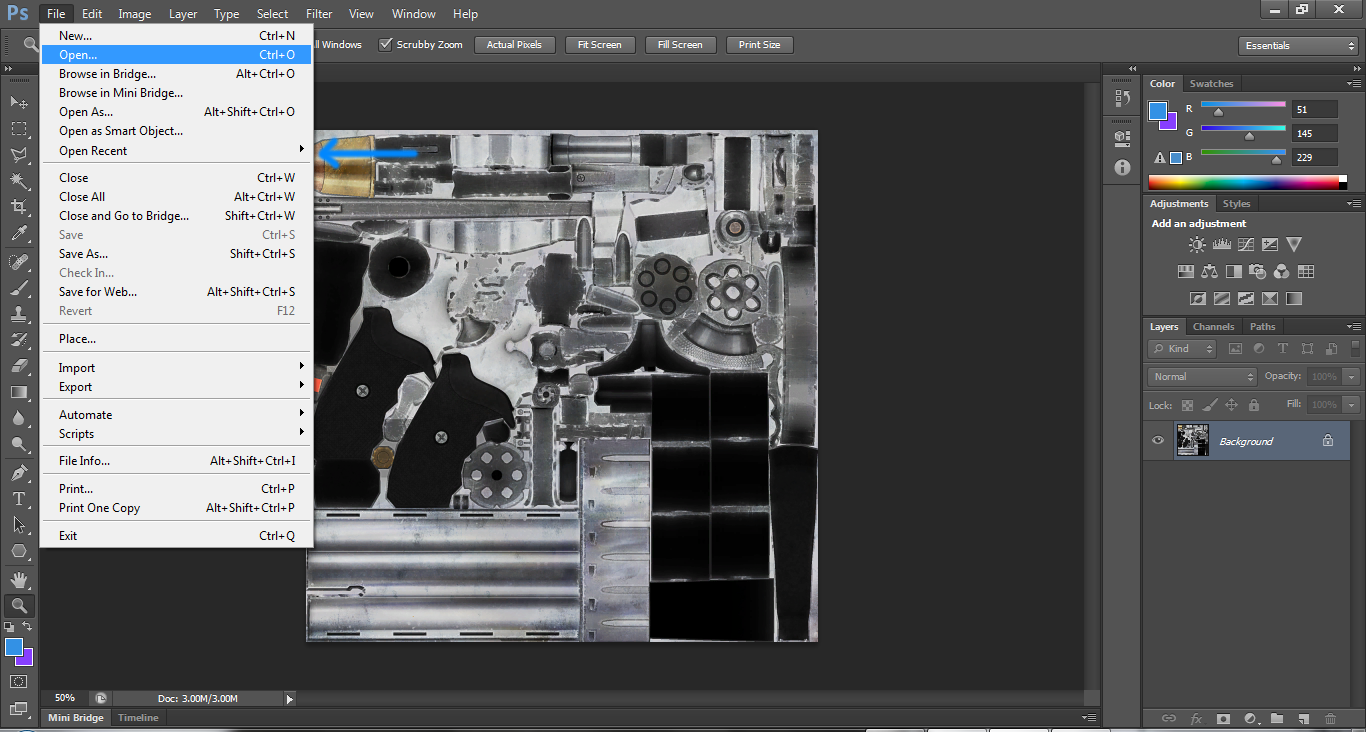
Also, Use open recent option in PS to reload the image quickly instead of using open option.
Using PS and Blender at the same time. I have used .png image in the example but if you have already worked with photoshop and using layers you might want to work with .psd file.
(Side note: Same thing goes for Gimp users or users from any other image editor)
______________________________
Thank You
This marks the end of the tutorial. For querries comment down below.
For Blender reference manual, Visit- https://docs.blender.org/manual/en/dev/
For my works, visit: http://www.warmerise.com/forums/topic/133/ra-ma-s-workshop
Happy skinning...


@thatcarguy . This is kind of a general tutorial . Follow the steps, as they are stated and you are good to go. From there you can create almost anything... the only limit will be your imagination (and the time it takes to complete the skin).